Posted by Chris Ellison - Oct 21, 2025 | Contact Author![]()
How to Convert and Upload DVD Library to Cloud Storage Device
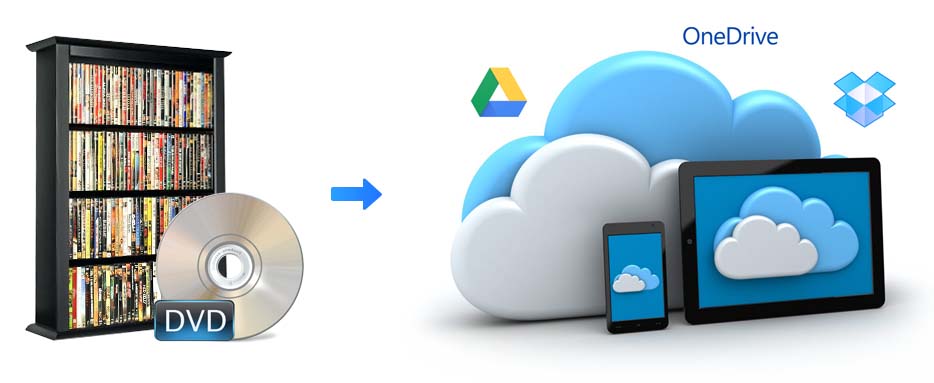
If you still reply on physical DVDs to watch your favorite movies, it's time to make a smarter move. Uploading DVD to cloud service opens up a world of possibilities, allowing you to stream and play your favorite movies through Internet on your TV, Plex, Roku, etc. without being tethered to a DVD player. By saving your DVD library to cloud, you can also protect your collection from scratches or aging, save physical storage space, and create permanent backups that are easily accessible anytime.
However, you cannot directly upload DVDs to cloud, whether it's a homemade DVD or a commercial DVD. To get your DVDs into the cloud, you may have to first use a DVD ripping program to convert DVDs to a digital video file, like MP4, and then upload that file to your cloud service, such as Google Drive, Dropbox, Apple iCloud, OneDrive, Amazon Cloud.
In this guide, we will walk you through how to convert both homemade and copy-protected DVDs to cloud-friendly formats, so that you can place your DVD library into your cloud service for streaming anywhere without disc hassle.
Part 1. Which Video Format You Shoud Use for Ripping DVD to Cloud?
Before we start digitizing DVD library for cloud, let's take a look at the supported formats by different cloud storage services. According to the table below, we can simply find that the uninversal video format for cloud storage is MP4 with the H.264 codec, as it strikes the best balance between file size and output quality. Therefore, you should rip DVD to MP4 with a DVD ripper and then upload the encoded MP4 movies to cloud for later smooth streaming.
Cloud storage service |
Supported Video Formats |
Supported Audio Formats |
Google Drive |
WebM, .MPEG4, .3GPP, .MOV, .AVI, .MPEGPS, .WMV, .FLV, .ogg |
MP3, MPEG, WAV, .ogg, .opus |
Dropbox |
.mp4, .mov, .mkv, .mpeg, .mpg, .mts, .avi, .dv, .3gp, .asf, m2ts, .webm, .vob, .wmv. |
.aac, .aif, .aiff, .flac, .m4a, .mp3, .wav |
Amazon Cloud |
MP4, QuickTime, AVI, MTS, MPG, ASF, WMV, Flash, HEIF, HEVC, and OGG. |
MP3, MP4, FLAC, OGA, OGG, and WAV |
Microsoft OneDrive |
3G2, 3GP, ASF, BMP, HEVC, M2TS, M4V, MOV, MP4, MP4V, MTS, TS, WMV |
MP3. AC3 is not supported |
iCloud |
MP4, MOV |
AAC, MP3, FLAC, AC3 |
Part 2. What's the Best Way to Convert DVDs to Cloud-Friendly Formats?
There are numbers of paid or free programs that claims to rip DVDs for cloud, such as MakeMKV and HandBrake. However, MakeMKV just extracts the video and audio from DVD. The output MKV file contain all DVD data without quality loss but it can as large as 4~8GB for a DVD movie. HandBrake can rip DVD to cloud MP4, but it can't rip a protected DVD. Worse still, it runs sluggish and often crashes in the middle of process. Which is the best tool to rip movie and TV shows from DVD for cloud?
If you're looking for an easy-to-use yet powerful tool for ripping any DVD to digital formats supported by cloud (Dropbox, iCloud, Google Drive, etc.), DumboFab DVD Ripper will be your best choice. This software is available to cope with both home-made and commercial DVD discs regardless of copy protections and region codes. With its powerful features and intuitive interface, DumboFab DVD Ripper makes the process fast, easy, and hassle-free.
▶ Convert DVDs to cloud supported format such as MP4 (H.264/HEVC), MOV, AVI, MKV and 200+ device presets without quality loss.
▶ Rip all encrypted DVDs to cloud, including DVDs with region codes, RCE, CSS, bad sectors, 99 titles, ARccOS, UOPs, APS, etc. without using 3rd-party software. You can build your own Plex movie library with DVDs bought from store or burned by yourself.
▶ Rip DVDs to cloud MP4 smoothly at a 5x faster speed than others with support for Intel/NVIDIA hardware acceleration.
▶ It can compress DVD for cloud by 80% smaller, adjust video/audio settings, trim, crop, merge, deinterlace, add external subtitle.
How to convert DVD to cloud-friendly formats in clicks
The step-by-step guide below takes the DVD to cloud converter Windows version as an example. The ripping process on macOS is almost the same.
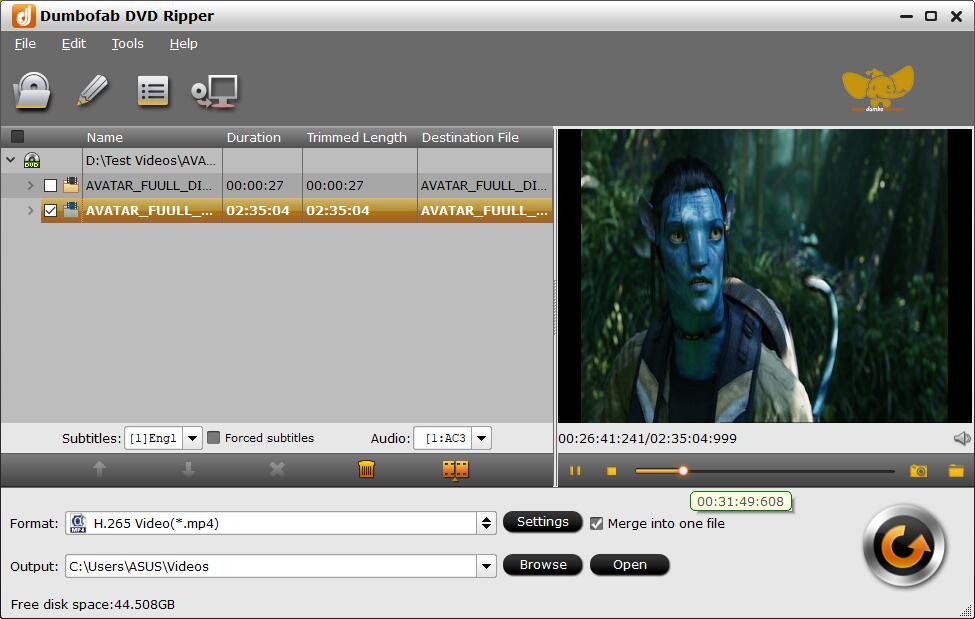
Step 1. Load source DVD.
Input the DVD disc to DVD-ROM. Launch DumboFab DVD Ripper and click the Load DVD button to import the original DVDs you want to put into cloud. It also supports DVD Folder and ISO Image. The DVD ripper supports advanced encryptions like navigation algorithm used in multiple titles. It will easily detect the correct title hiden in DVDs from Disney, Sony, Paramount, etc.
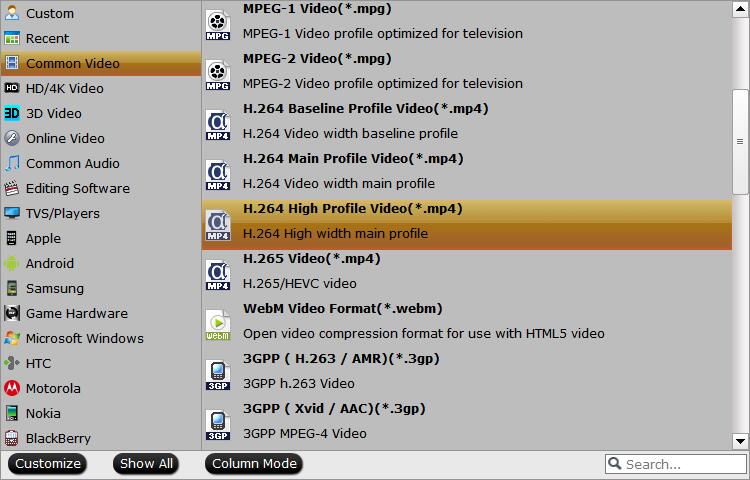
Step 2. Choose a proper output format for cloud storage.
Choose a desired output format profile. If you'll archive the result file into cloud, make sure the chosen format is supported by the cloud storage service you use. Basically, MP4 (h.264+aac) is recommended, as it strikes the best balance between file size and output quality which is an universal format supported by almost all cloud storage service and multimedia devices. And you can refer the above table to get the best format for your final cloud storage service.
If you desire to play the converted DVDs on Apple TV, iPad, iPhone Samsung table, PS4, Xbox One and any of other portable device, you can choose directly an optimal preset for your device from the correspoding Device category.
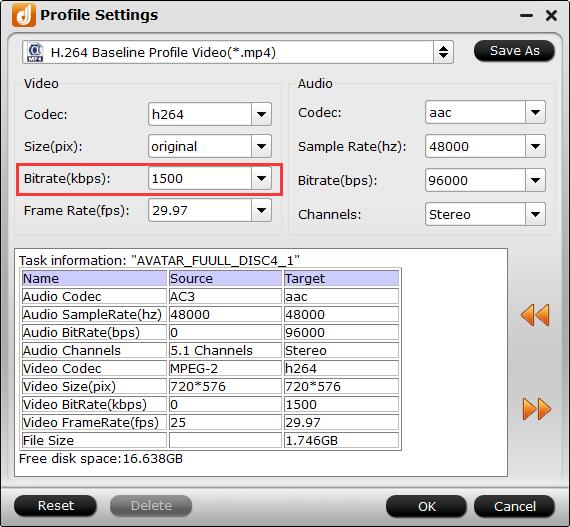
Tips: Flexible options are offered to further reduce the size of the ripped MP4 video. Click the Settings button beside the profile bar and enter into the "Profile Settings" window. A slew of other variables such the video/audio codecs, pixel dimensions, frame rate, bit rate, audio sampel rate, etc. will help convert a DVD at 7.5GB to a smaller MP4 file at 1.0GB-1.4GB.
Recommended video size settings for digitizing DVDs to Cloud:
◈ You're not suggested to adjust the frame rate and aspect ratio, if not necessary.
◈ Lower the bitrate to a lower level. For example, adjusting the original medium quality to bitrates of around 1500-2000 is acceptable without noticeable pixellation.
◈ Lower the resolution. Typical DVD videos are 720×480 (NTSC) and 720×540 (PAL). Adjust the resolution to 640×480 won't make any quality difference.
Note: Adjusting these variables have some effect on the re-encoded video quality. Remember the file size and video quality is based more on bitrate than resolution which means video/audio bitrate higher results in big file size, and lower visible quality loss.
Step 3. Start the DVD to Cloud ripping.
Finally, click the big "Convert" button to start ripping the movie to the digital file accepted by your cloud storage device.
Step 4. Save and Upload the DVD digital copies to Cloud.
Once being converted to digital files, your DVD rips can be transferred to the cloud service such as Dropbox, OneDrive, Google Drive, Amazon Drive, and iCloud. They will keep your DVD digital library secure and allow you to stream them on demand to whatever cloud-compatible devices.
Part 3. How to Upload Ripped DVD Movies to Cloud?
Once the DVDs being converted to digital files, you can then put them on your cloud service, and then stream movies on demand to whatever devices support that service; or you can turn your PC into a media server and effectively host your own "cloud". The steps is straightforward and uploading DVD movies to Google Drive, Dropbox, iCloud, Amazon Cloud, iCloud, Box, etc. is similar.
After the storing DVD movies in the cloud, you can play the files directly online (but the Network speed is a deciding factor), and download them to local disks. Outstandingly, cloud service makes movies, music and photos more portable. Only if you have an online account, you can use the movies on your home PC, work PC and portable PC, stream it to an app, Chromecast, Smart TV, Roku player or a set-top box.
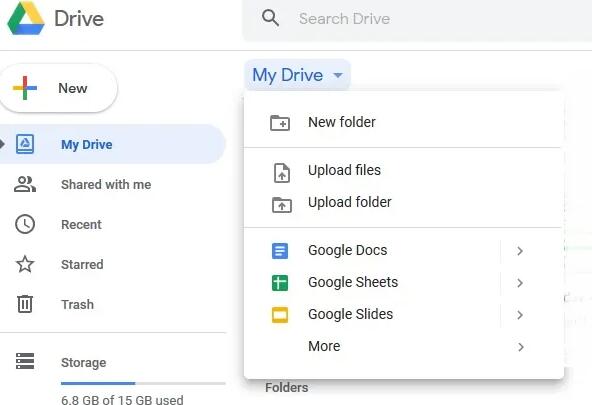
How to upload DVD movies to Google Drive
Step 1. Navigate to drive.google.com and log in your account.
Step 2. Click the + New button and click Upload files or Upload folder if you are going to upload the whole rips.
Step 3. Choose the converted DVD files and click "Open" to upload to the Google Drive. There isn't any daily or monthly upload limit. And the maximum size per file is large and won't pose any problem at all.
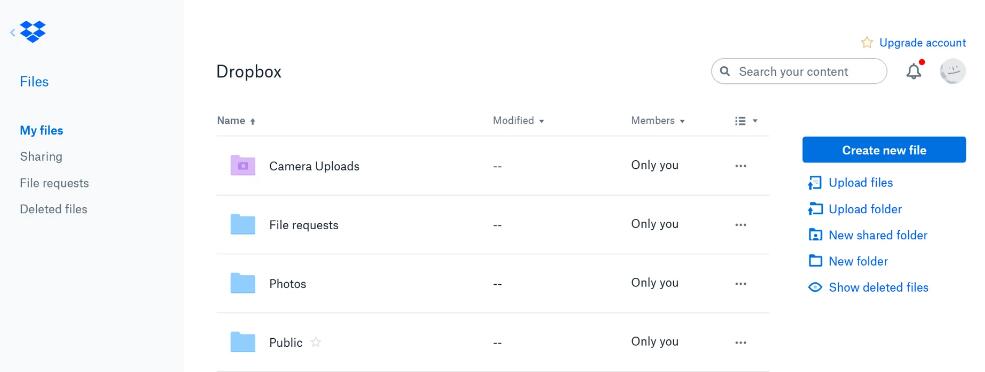
How to upload DVD movies to Dropbox
Step 1. Navigate to Dropbox site and log in your account.
Step 2. Click the "Upload files" button. Then you can find a window pop up, click "Choose Files".
Step 3. Choose the converted DVD files and click "Open" to upload to the Dropbox.
Note: The total movie size should be less than 50GB if you upload the movies through your web browser. In another word, you can just upload around 30-40 DVD rips to dropbox.com at a time.
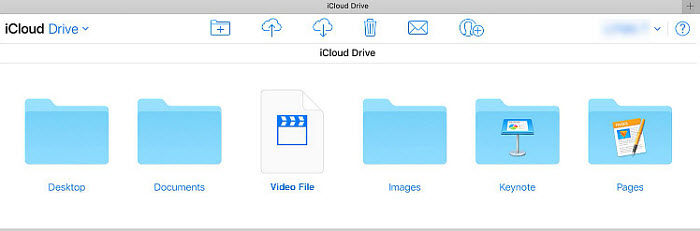
How to upload DVD movies to iCloud
Step 1. Select and open the iCloud Drive app on your Mac or PC.
Step 2. Log in to your iCloud account with your account name and password.
Step 3. Click on the "Photos" icon. Click on the "Upload" button and select the DVD movies you want to upload from your selected folder. Or you can simply drag the ripped DVD movie to iCloud Drive from your Mac or PC desktop.